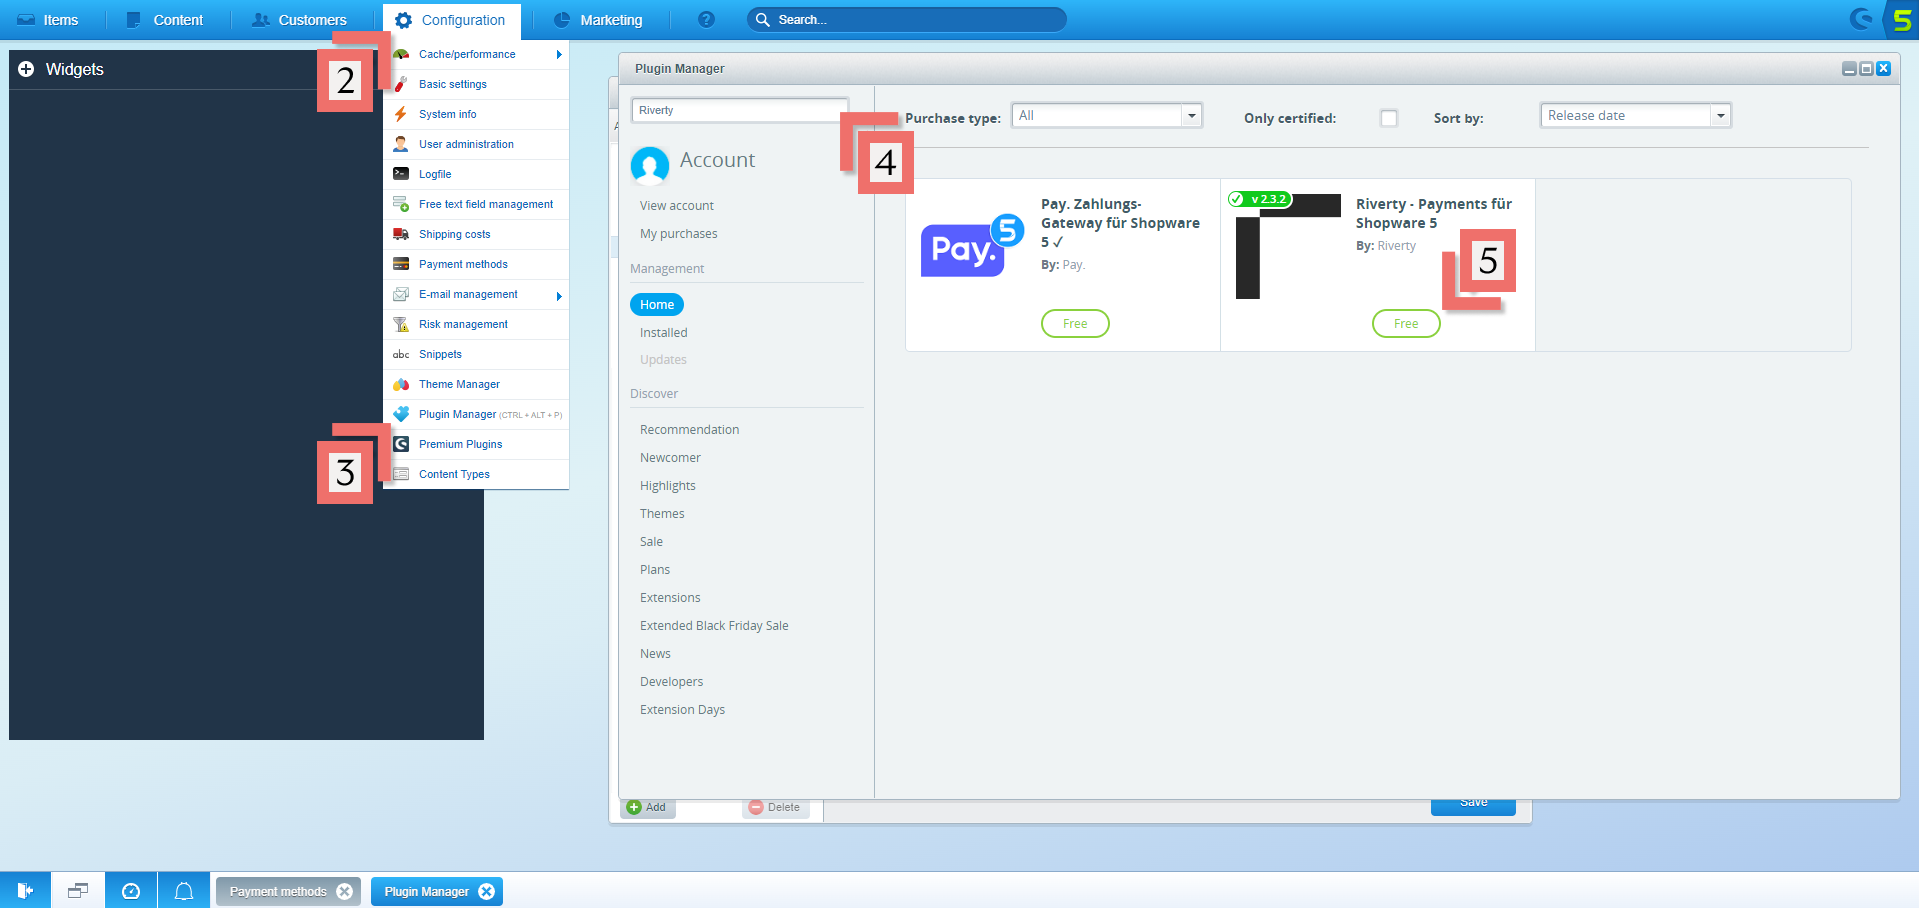
Introduction
This guide describes the functionalities of the Riverty module for Shopware and how to set up the plugin in your webshop.
We offer 3 different payment options:
- 14-day invoice - This is the default 14-day invoice payment method in Riverty. It is always available in every market where Riverty operates. It is primarily meant for business-to-consumer sales.
- Direct Debit - This is a Direct Debit version of the 14-day invoice payment method Instead of receiving an invoice to be paid via their bank, the customer enters their bank details, and the money is immediately deducted from their bank account.
- Instalments - This is a Part Payment invoice. The customer can split their purchase over multiple monthly fixed payments.
The payment methods that are available via this plugin can be found in this table:
Country | 14-day invoice | Direct Debit | Fixed instalments |
---|---|---|---|
Germany | |||
Austria | |||
The Netherlands |
Setup
This document assumes that you already have a working webshop that uses Shopware (version 5).
What you need
- A Shopware instance version 5 up to 5.7.11, installed on your webserver.
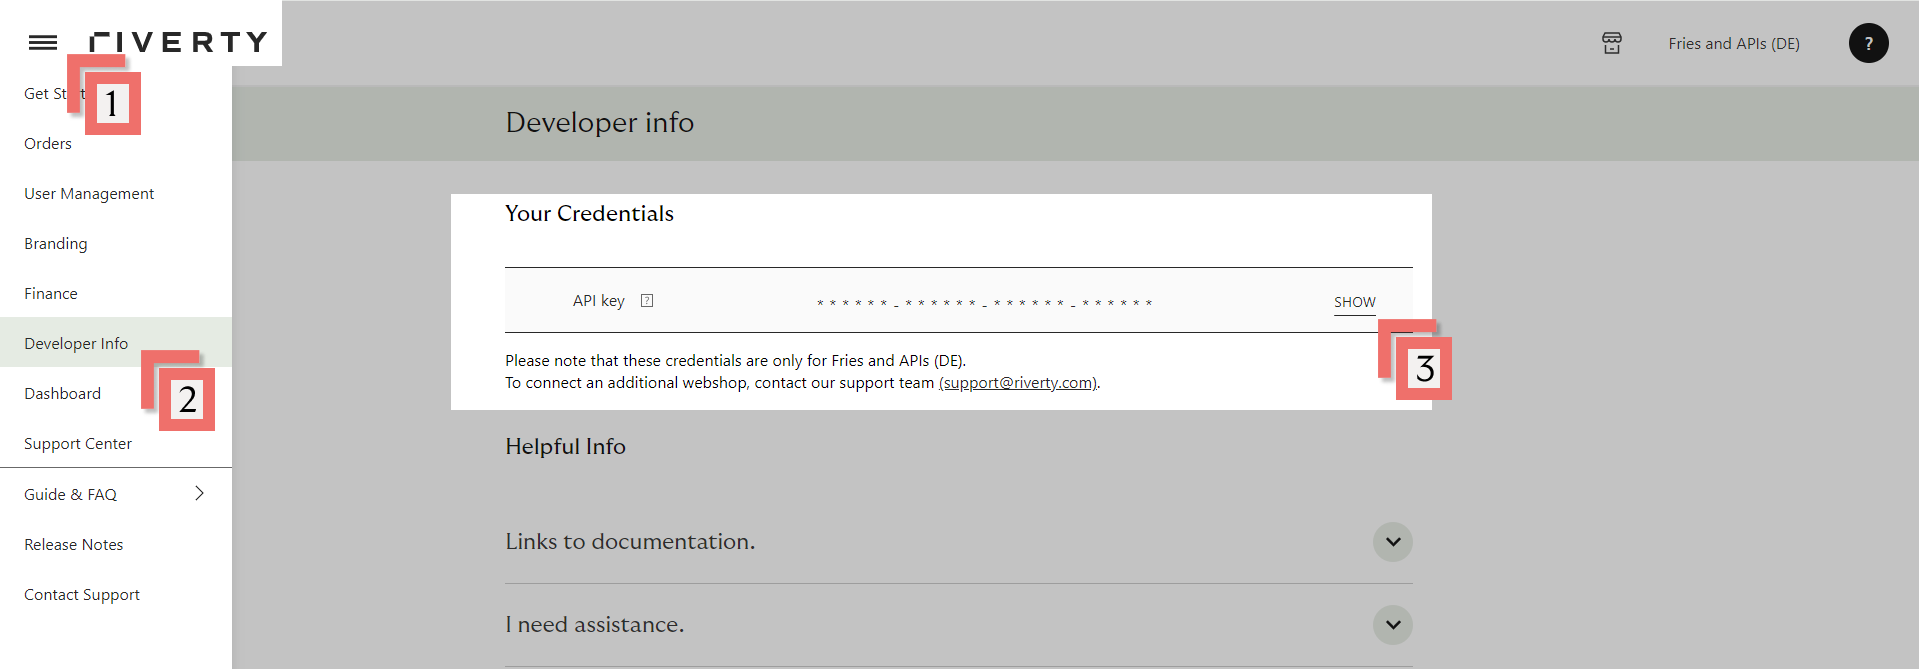
- An API key.
- If you just want to try Riverty without commitment, you can get one via the Developer Sandbox.
- Test Mode credentials will be provided by your Implementation Manager at Riverty.
- When you are ready to go live, contact your Implementation Manager at Riverty. They
will configure your webshop in the backend, and give you the real production API Key.
You will also need to include the Riverty logos and Terms & Conditions / Privacy Policy links in your webshop's design, especially at the Checkout page.
Basic settings
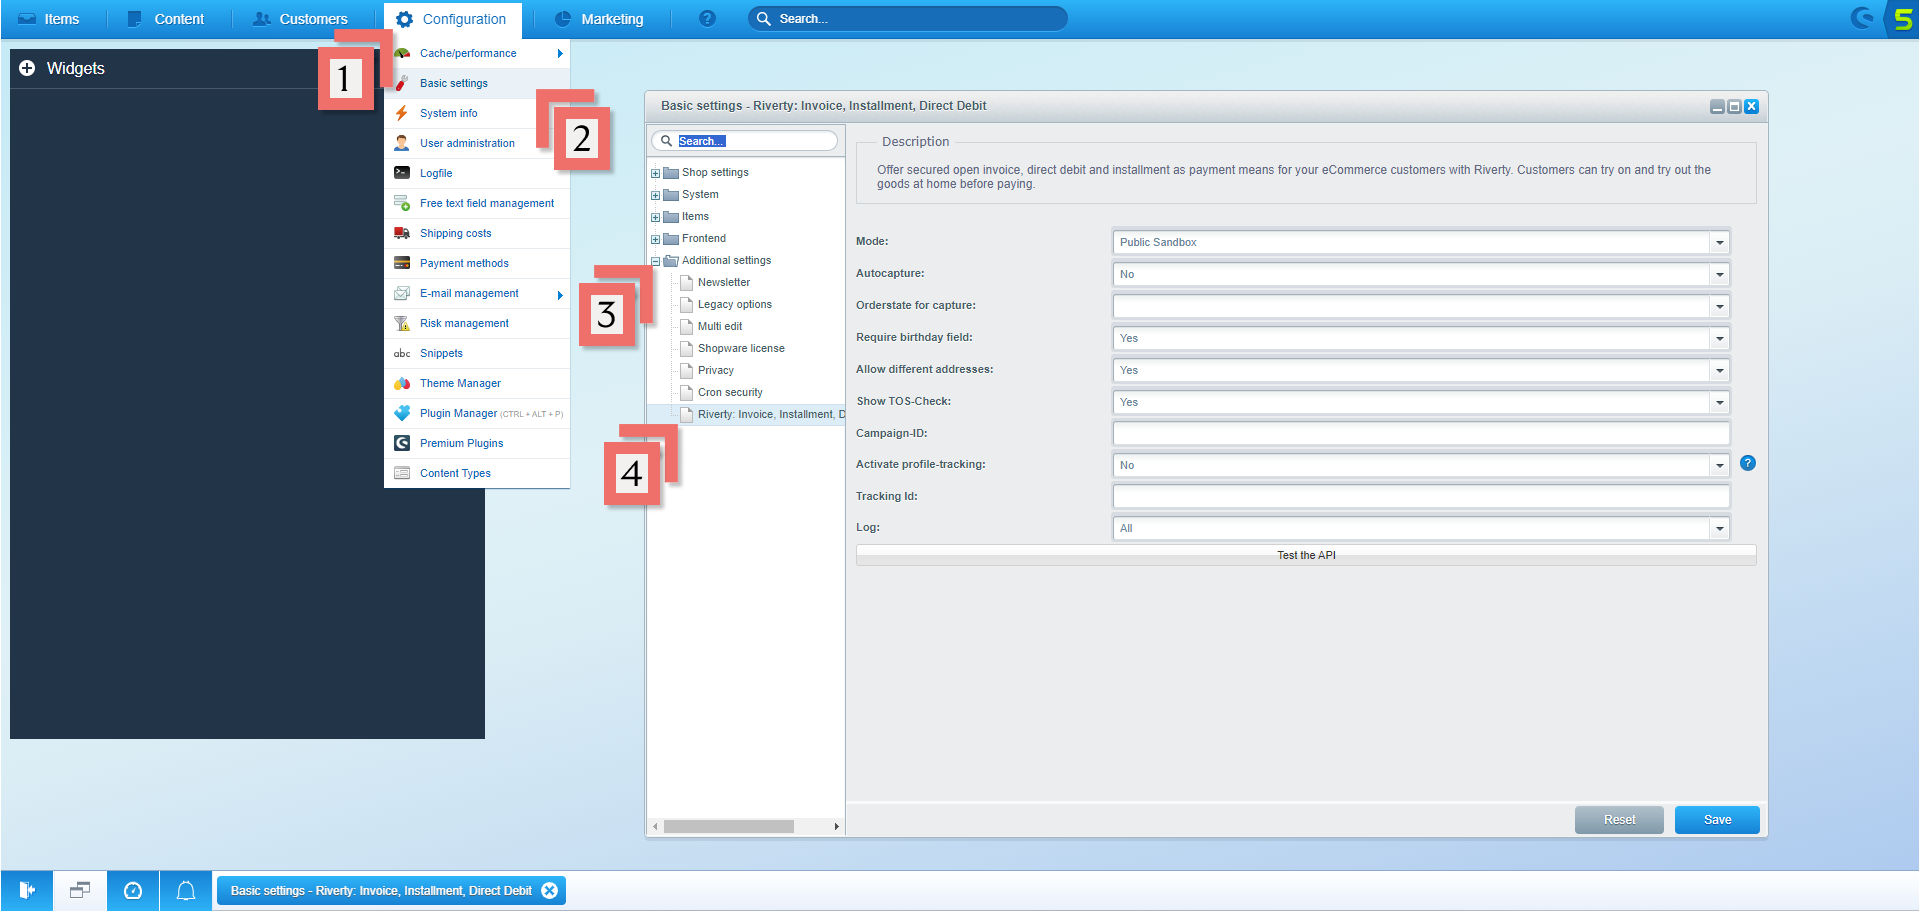
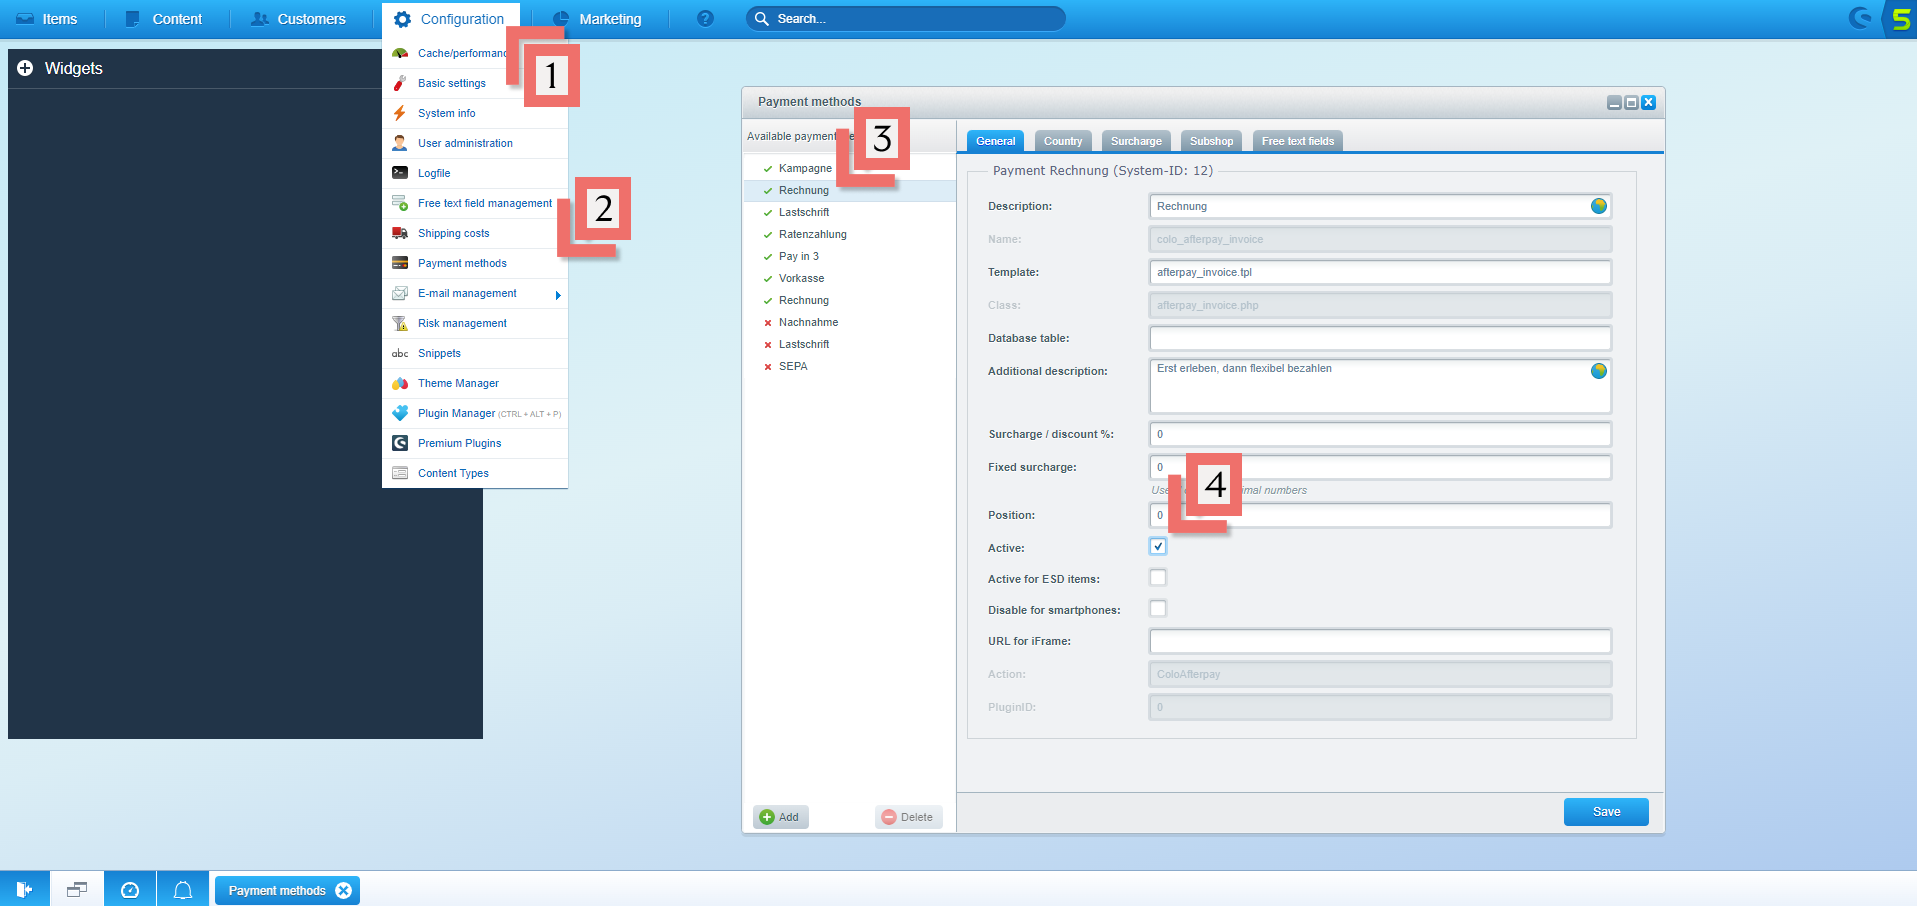
Basic settings can be accessed from the Shopware main menu as follows:
Configuration -> Basic Settings -> Additional Settings -> Riverty
- Mode: This setting determines whether the plugin runs in testing or live mode.
- Autocapture: If activated, the plugin will trigger an automated capture via cronjob based on current order status.
- Order state for capture: This defines the order status which will trigger an automated capture.
- Require birthday field: Prompt for date of birth if none was entered during the registration process.
- Allow different addresses: Allow shipping address to differ from billing address when using an Riverty payment method.
- Show TOS-check: Display a checkbox with terms and conditions / additional information during checkout. The message can be customized by editing the ConfirmMerchantCheck boilerplate.
- Campaign-ID: This ID is transmitted by Riverty when using the “Campaign“ payment method.
- Activate Profile Tracking: Please only activate this when asked to do so by Riverty.
- - Tracking Id: Please consult Riverty to receive your Profile Tracking Id.
- Log: Defines the logging level. Log files will be stored in the plugin folder.
Country settings
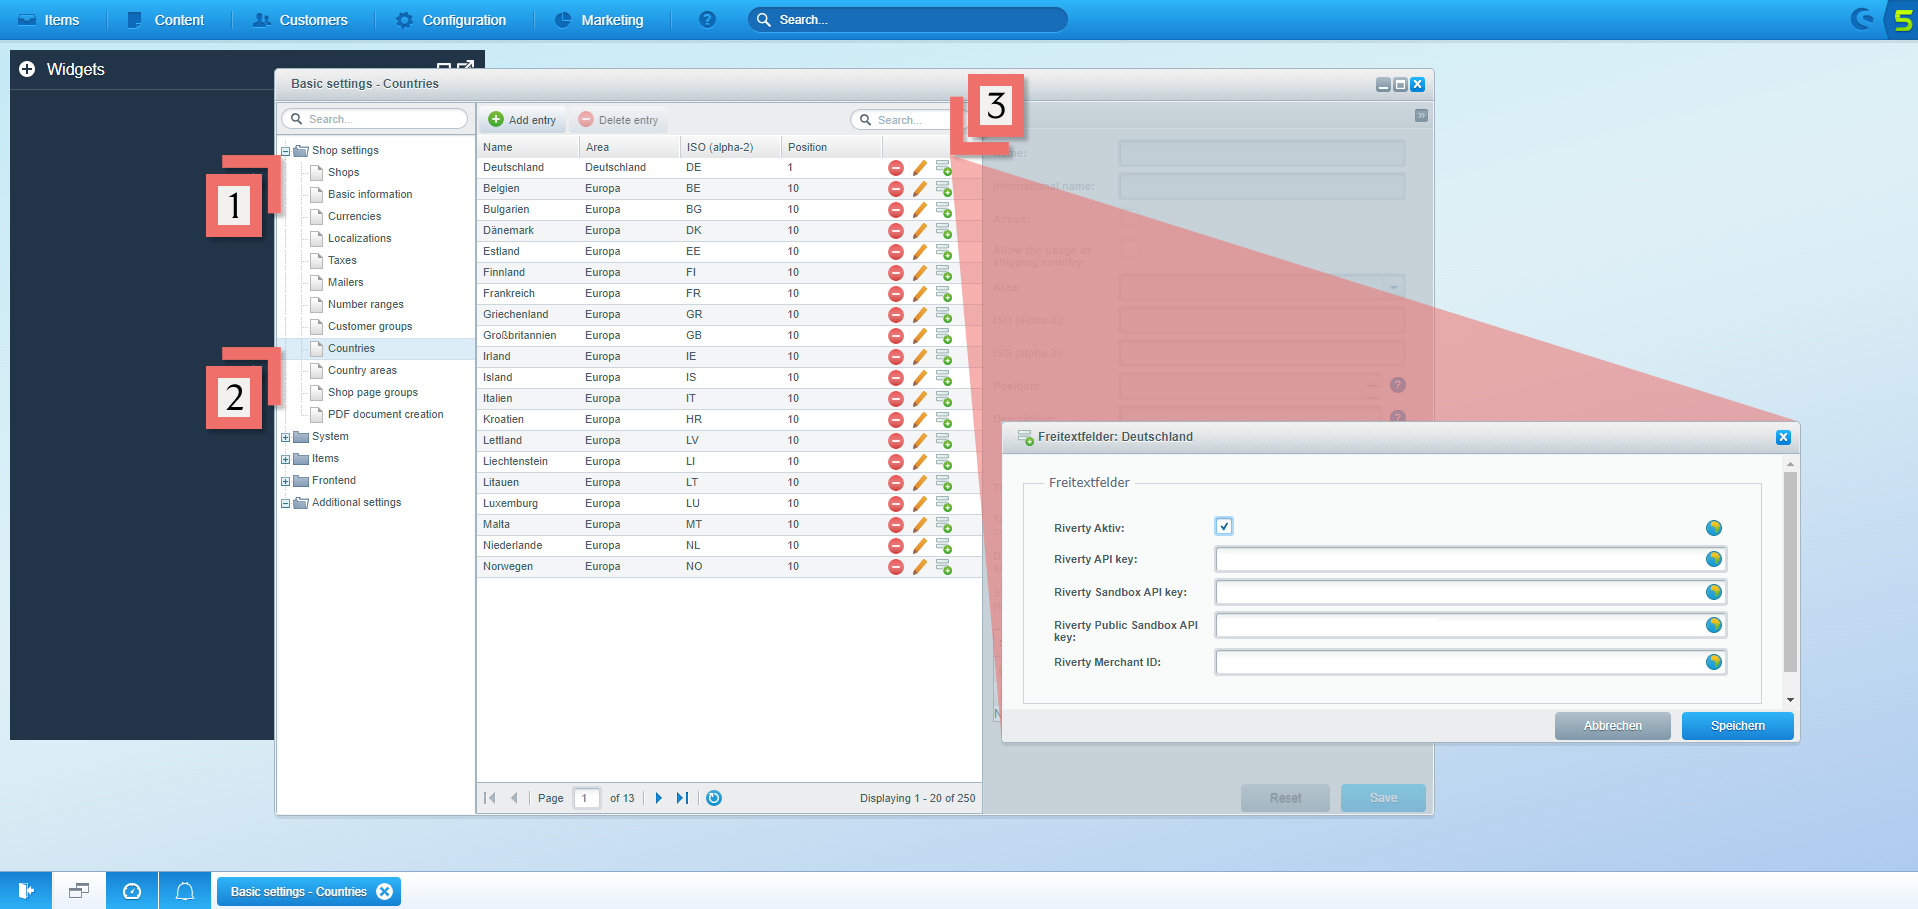
Country settings can be accessed from the Shopware main menu as follows:
**Configuration -> Shop Settings -> Countries **
Clicking the “free text fields” button in any row in the country list will bring up the settings described below.
- Aktiv: Determines whether Riverty payment methods are offered in this country.
- Riverty API key: X-Auth Key for live operation, will be communicated by Riverty.
- Riverty Sandbox API key: X-Auth Key for test operation, will be communicated by Riverty.
- Riverty Public Sandbox API key: X-Auth Key for the public sandbox. An API Key for the public sandbox can be retrieved from the following link
- Riverty Merchant ID: Only fill in if communicated by Riverty. Used to customize terms and conditions displayed during checkout.
Payment method settings
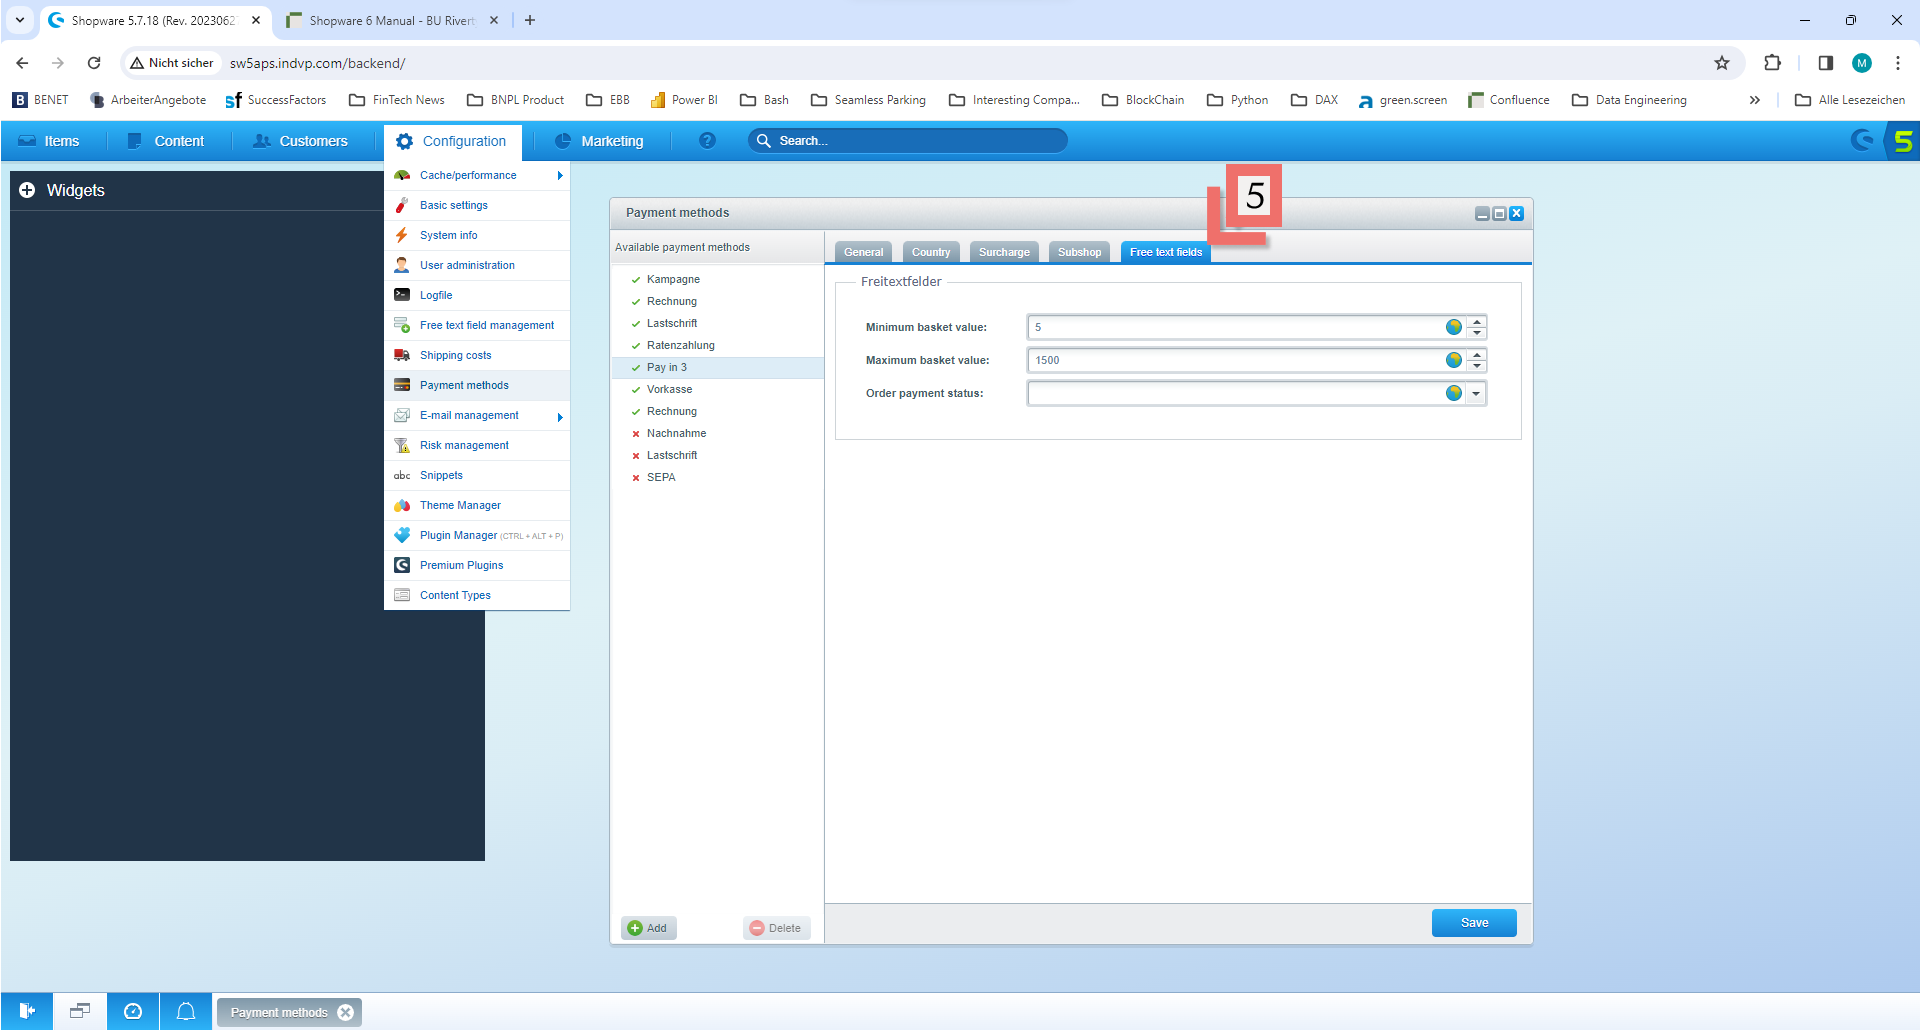
Payment method settings can be accessed from the Shopware main menu as follows: Configuration -> Payment methods -> Free text fields
- Minimum basket value: Lowest gross value of shopping cart (including shipping and fees) from which the payment method shall be offered.
- Maximum basket value: Highest gross value of shopping cart (including shipping and fees) up to which the payment method shall be offered.
- Order payment status: This determines the payment status assigned to the order after successful authorization.
Manage your orders
Capturing orders
The plugin offers automatic as well as manual capture options.
- Manual Capture: A Capture icon will appear in the order overview once the relevant capture status (predefined in General Settings – Bestellstatus für Capture) is reached. The icon will disappear after successful capture.
- Automatic Capture: If automatic capture is enabled in General Settings, captures will be performed by a cronjob in regular intervals. The frequency of automatic captures can be adjusted in the cronjob settings (Configuration -> Basic settings -> System -> Cronjobs).
We recommend that you capture right after the order has been marked as shipped.
Additional options
Sandbox orders: Sandbox orders will be marked in the order overview by adding a yellow background to the order number. The ordering mode (sandbox or live) is stored with every order and will be taken into account during capture/refund operations.
Display of inactive payment methods: Any payment method that is not being offered (based on the country, customer’s age or other criteria) will still be displayed in the frontend but cannot be selected. If this behavior is not desired, it can be changed via Basic Settings -> Riskmanagement.
Logs: Log files will be stored in the plugin folder and therefore kept separate from system logs.
Go-live
In this chapter, we will explain which steps you need to take to enable the payment method on production.
Configure live mode
Once you and your Implementation Manager are satisfied with the validation of account setup and testing, you will get a Live Auth key and can start offering Riverty to your customers!
Note, you will only get the Live Auth Key after you have signed the contract with Riverty.
Last check (Only applicable for the BeNeLux)
Now that Riverty is live, we only have to check whether orders are also coming in properly.
You can test this per Riverty connection by placing a rejected order:
STEP 1
Go to the webshop, and place a product in the shopping cart.
STEP 2
Go to checkout and fill in the necessary information, for the email address you have to enter rejection@afterpay.nl.
STEP 3
Choose the payment method Riverty and finish the order.
RESULT
The Riverty order should be rejected. If this is not the case and instead you receive a technical error or an authorization error please contact your Riverty Implementation Manager.
Done
Congratulations! You just went live with your Riverty connection. Please notify your Riverty Implementation Manager that you went live. If you encounter any issues in the upcoming week you can contact your Riverty Implementation Manager. After that period you can contact our local Merchant Desk for help.
Introduction to the Riverty Merchant Portal
You can go to the Merchant Portal here. Once logged in, you will also see an in-depth guide on how to best use it.
In the merchant portal you can:
- View and mutate your Riverty orders
- Get financial reports
- Setup your branding in the Riverty systems